Integrations in Workflowy let you bring content in (and eventually connect more deeply) by linking Workflowy with other tools you already use. For example:
In short: Integrations let Workflowy become a central hub - capturing your digital life from other apps so you stay in flow.
Send information automatically to Workflowy from thousands of applications with our integrations.
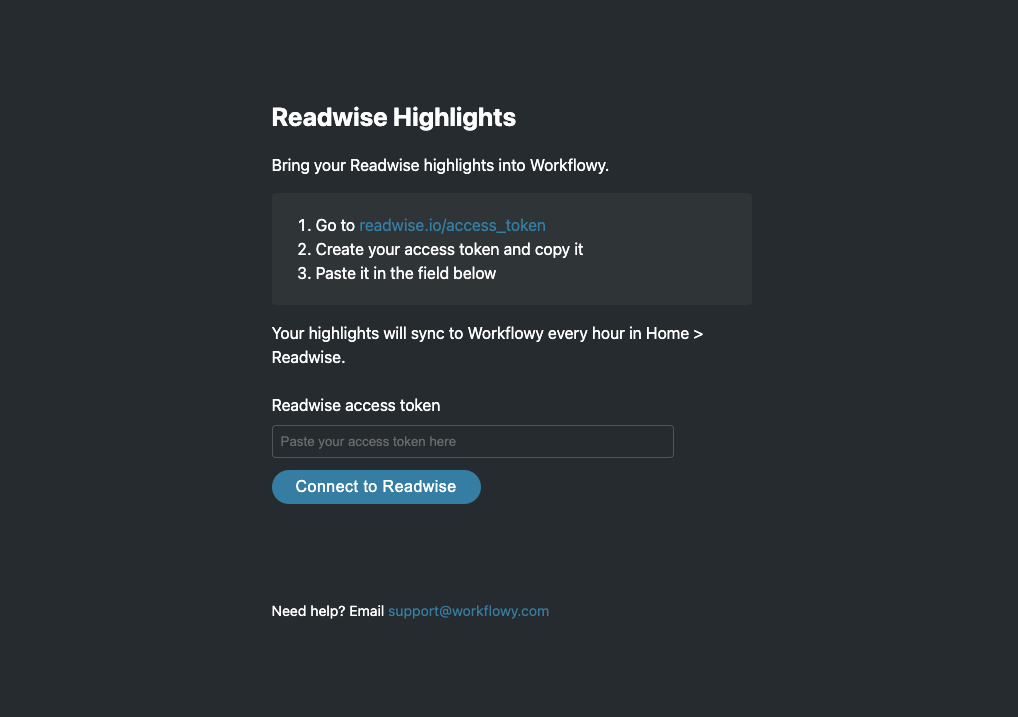
Sync your reading highlights from Readwise directly into Workflowy.
Connect your Readwise account and import all your book highlights, article clips, tweets, and podcast notes as a structured hierarchy.
1. Visit readwise.io/access_token to get your readwise token
2. Visit https://workflowy.com/integrations/readwise/ to paste your readwise token
3. Press 'Connect to readwise'

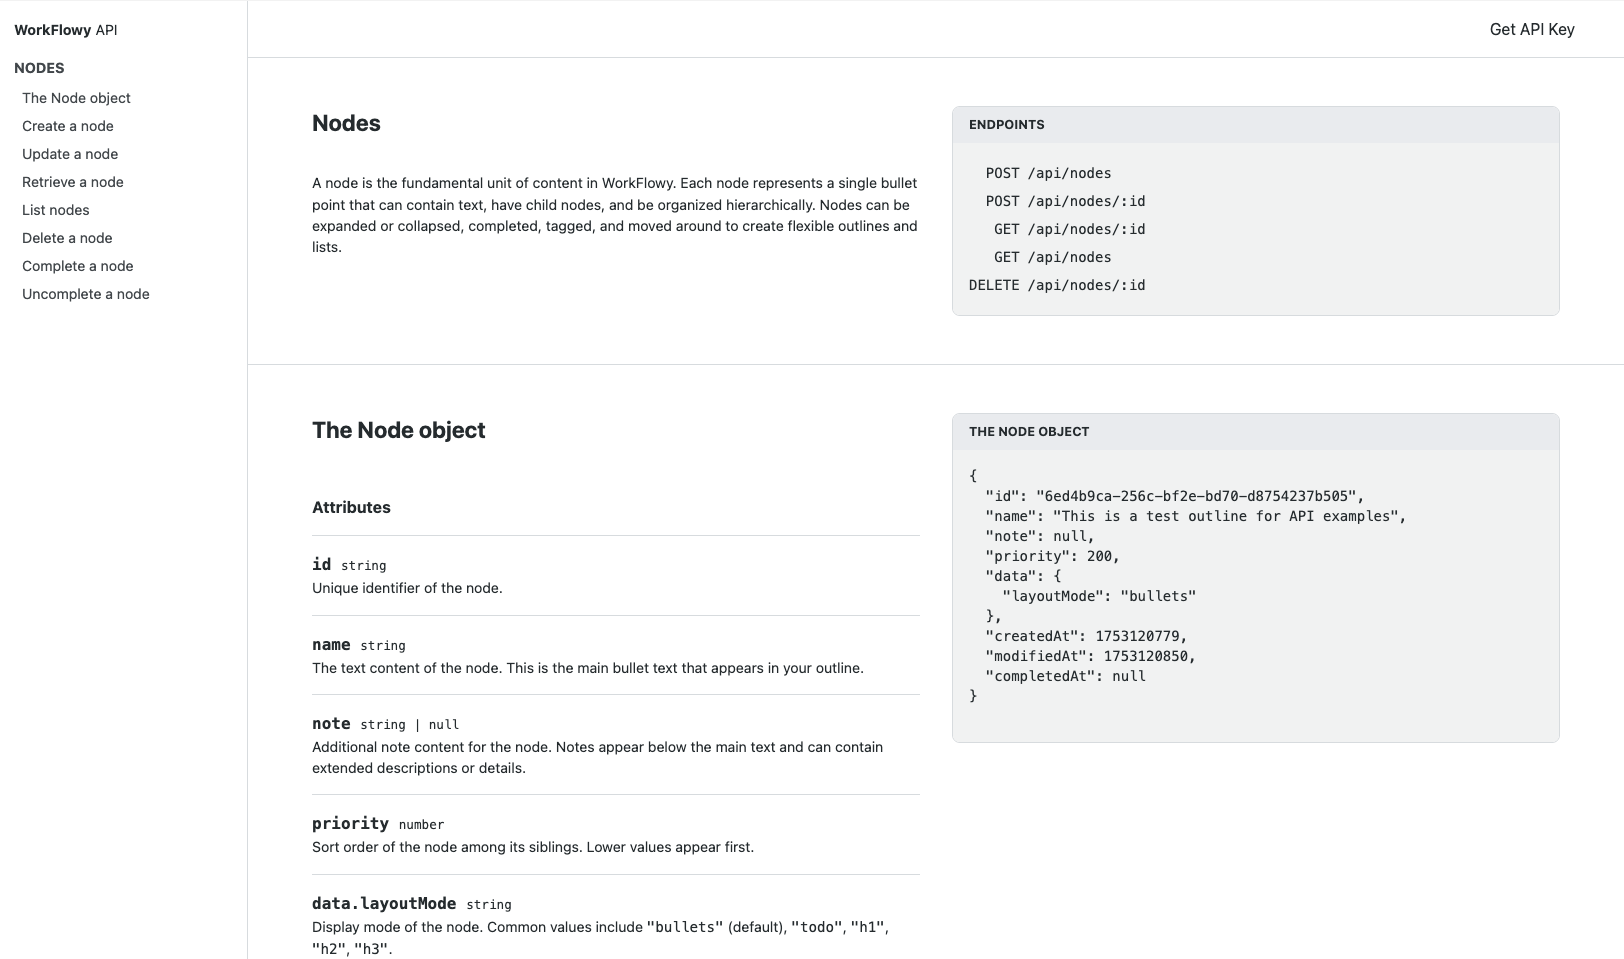
A basic API that lets you connect Workflowy to other applications and flows. Development not included.
1. Visit https://beta.workflowy.com/api-reference/ to learn about the API
2. Write your code and integrate it with Workflowy!

Currently, you can only send content to Workflowy. We plan to allow sending from Workflowy later.
Create a Zap that sends content to a new item upon receiving a trigger event from a third-party app.
Connect third-party apps to Workflowy using Zapier, and unlock nearly limitless possibilities for capturing your ideas, tasks, notes, and research material.
Note: Before you begin -
1. Start by creating a new Zap in Zapier and set the 'Trigger' event (e.g. new task in Todoist). When you've done this, your Zap should look like this. Click 'Continue'.

2. Next, you'll define the 'Action' step using Workflowy. Search for and select 'Workflowy" in the 'Change Action' screen.

3. Under 'App & Event,' choose the 'Create bullet' event and click 'Continue.'

4. In the 'Account' section, click or tap 'Sign in' and follow the pop-up instructions. Need help? Read 'How do I get a Workflowy API key?'.

5. When your account is connected, add a save location URL in the 'Action' section. You can leave this empty, and new bullets will be saved to your Workflowy 'Home.' Need help? Read 'How do I get a Workflowy save location URL?'.

6. Next, specify the content to be included in your bullet and its note.

7. Finally, test the action, click 'Publish,' and your setup is complete.

Note: zaps can take anywhere from 1 - 15 minutes to run depending on your zapier subscription level.
1. Visit this page: https://workflowy.com/api-key
2. Generate the Workflowy API key, and click 'Copy'.

3. Return to the Zapier 'Connect' pop-up, paste the API key into the text field, and click 'Yes, Continue...'.

4. Your Zap is now connected to Workflowy. The green check in your Zap shows this. No green check? See the Troubleshooting section below.

Note: Your API key won't expire. To protect the security of your account, do not share your API key with others.
You can choose where your Zap will create new bullets. This is useful for sending different types of content to different locations (e.g. new ideas to an 'Inbox' bullet, project tasks to a shared Workflowy Board, or using Workflowy as an RSS reader).
There are two ways to get a bullet URL:
A. Navigate to your preferred Workflowy save location and copy the browser URL or use 'Copy item URL' from the item menu.

B. Select 'Copy item URL' from the item menu on any item.

Yes, you can use. Follow the method described in 'How do I get a Workflowy save location URL?' above. You'll need 'Can edit' permissions or higher. Learn more in this Sharing article.
"This auth is expired. Please reconnect it here." or
"Authentication failed: The app returned "Invalid Credentials, try again."
"Save location URL is invalid" or "Save location not found"
Check that you've added a valid Workflowy URL ('e.g https://workflowy.com/#/x2f8ae43c8fb'). Still stuck? See How do I get a Workflowy save location URL?
"Permission denied"
You'll need 'Can edit' permissions or higher to save to a shared bullet. Ask the owner to change your access permissions. Learn more in this Sharing article.
"Monthly item quota used"
You've reached your Free account monthly bullet limit. Upgrade your account to Pro for unlimited bullets.
"Rate limit reached"
A Zap can only send a maximum of 100 new bullets every minute. Make sure the 'Trigger' event isn't firing more than 100 times per minute or the 'Action' step isn't creating more than 100 new bullets at once.
"Your Gmail data can only be sent to approved apps"Google has set up security restrictions that prevent most Zapier apps from accessing free Gmail accounts ending with @gmail.com and @googlemail.com.
Want to send emails from an @gmail.com or @googlemail.com account? Use our 'Gmail emails' template.
We have a growing collection of zapier templates ready for you to use to get started sending information to Workflowy in our integrations library.
Got a request for a Zap or made a cool Zap that you want to share? Share your zap with us.
Check the 'Zaps' section on Zapier's service status page. If there are no reported issues, contact Workflowy support.
Our Apple shortcut lets you quickly send information to Workflowy from your Mac desktop or iOS devices. You can combine Apple shortcuts with Siri to capture notes hands-free.
Apple shortcuts work on macOS, iOS, iPadOS, and watchOS.
Learn more about Apple Shortcuts on iOS, and Mac.
1. Open the Apple shortcut link
2. Click 'Get Shortcut' button to save the shortcut
3. The Apple shortcuts app will open, click 'Add shortcut...'
4. Input your Workflowy API key
5. Enter the Workflowy URL where you want to save content
6. Click 'Add Shortcut' to save your API key and save location
7. Trigger the shortcut with siri by saying 'Hey Siri, save my idea'
You can now speak and whatever you say will be saved to your Workflowy account.
Note: You can also trigger this shortcut from the menubar of your Mac desktop.